
Mold is a pervasive issue that can significantly impact the health of residents and the integrity of homes. Understanding the best practices for Mold removal is crucial for homeowners, especially in areas prone to moisture and humidity. This article outlines comprehensive strategies for safe and effective mold remediation, ensuring a healthier living environment.

Image Source: vital oxide
Understanding Mold and Its Risks
Mold is a type of fungus that thrives in damp conditions. It can grow on various surfaces, including wood, drywall, and fabric, and can lead to serious health issues.
Health Implications of Mold Exposure
Exposure to mold can result in a range of health problems, particularly for sensitive individuals. Common health effects include:
- Respiratory Issues: Mold spores can exacerbate asthma and trigger allergic reactions, leading to coughing, sneezing, and difficulty breathing.
- Skin Reactions: Direct contact with mold can cause skin irritations, rashes, and other dermatological issues.
- Toxic Reactions: Certain molds, such as Stachybotrys chartarum (commonly known as black mold), produce mycotoxins that can lead to severe health complications if inhaled.
Why Mold Thrives in Homes
Mold growth is often facilitated by specific environmental conditions:
- Humidity: High humidity levels, particularly above 60%, create an ideal environment for mold proliferation.
- Water Leaks: Plumbing leaks, roof leaks, and condensation can introduce moisture into homes, promoting mold growth.
- Poor Ventilation: Inadequate airflow can trap humidity indoors, further encouraging mold development.
Identifying Mold Problems
Before embarking on mold removal, it’s essential to identify the extent of the problem.
Signs of Mold Presence
Homeowners should be vigilant for the following indicators of mold:
- Visible Mold Growth: Dark spots or fuzzy patches on walls, ceilings, or floors.
- Musty Odors: A persistent, earthy smell often accompanies mold infestations.
- Water Damage: Stains or discoloration on surfaces may indicate underlying moisture issues.
Conducting a Thorough Inspection
A comprehensive inspection is vital for effective mold remediation:
- Visual Assessment: Examine areas prone to moisture, such as bathrooms, kitchens, and basements.
- Moisture Detection: Use moisture meters to identify hidden damp areas that may harbor mold.
- Air Quality Testing: Consider professional testing to assess mold spore levels in the air.
Preparing for Mold Removal
Preparation is key to a successful mold remediation process.
Safety Precautions
Before starting the cleanup, ensure safety by taking the following precautions:
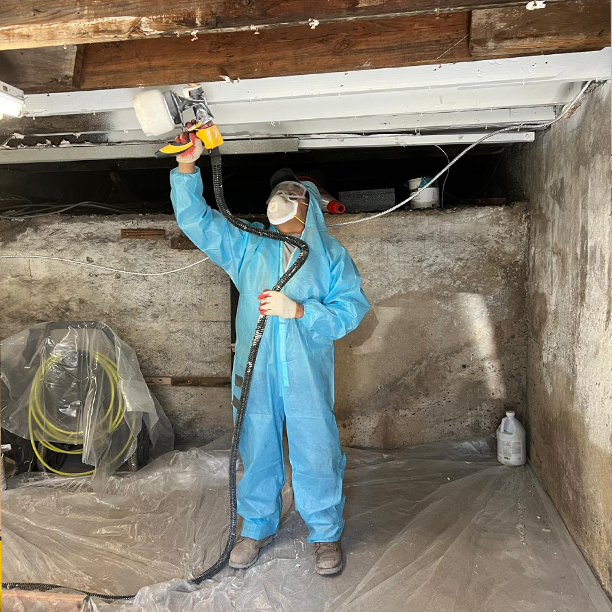
- Protective Gear: Wear N95 respirators, gloves, and goggles to shield against mold spores.
- Ventilation: Open windows and doors to improve airflow and reduce exposure to airborne spores.
- Containment: Seal off affected areas with plastic sheeting to prevent spores from spreading to other parts of the home.
Gathering Necessary Supplies
Having the right tools and materials on hand can streamline the mold removal process:
- Cleaning Solutions: Use a mixture of water and detergent or specialized mold removers. Avoid mixing bleach with ammonia or other cleaners.
- Absorbent Materials: Have sponges, rags, and disposable towels ready for cleanup.
- Disposal Bags: Use heavy-duty trash bags for disposing of contaminated materials.
The Mold Removal Process
Once prepared, follow a systematic approach to remove mold effectively.
Step 1: Containment
Isolate the affected area to prevent spores from spreading:
- Seal Off Areas: Use plastic sheeting to cover doorways and vents.
- Negative Air Pressure: If possible, use a fan to create negative pressure in the contaminated area, directing airflow outside.
Step 2: Removal of Contaminated Materials
Carefully remove materials that cannot be salvaged:
- Discard Moldy Items: Dispose of porous materials like carpets, drywall, and insulation that are heavily infested.
- Clean Non-Porous Surfaces: For surfaces like tiles and glass, scrub with a mold-killing solution and rinse thoroughly.
Step 3: Cleaning and Disinfecting
After removing contaminated materials, clean the area:
- Scrub Surfaces: Use brushes and sponges to scrub surfaces with a mold removal solution.
- Disinfect: Apply a disinfectant to kill any remaining spores.
Step 4: Drying
Thoroughly dry the area to prevent future mold growth:
- Use Dehumidifiers: Employ dehumidifiers to reduce humidity levels.
- Ventilation: Keep windows open and use fans to promote airflow.
Step 5: Final Inspection
After cleanup, conduct a final inspection to ensure the area is mold-free:
- Air Quality Testing: Consider testing the air quality to confirm that mold spore levels are within safe limits.
- Visual Check: Look for any signs of remaining mold or moisture.
Preventing Future Mold Growth
Once mold has been removed, it’s essential to implement preventive measures.
Control Humidity Levels
Maintaining optimal humidity levels is crucial:
- Use Dehumidifiers: In areas prone to moisture, such as basements and bathrooms, dehumidifiers can help keep humidity below 50%.
- Monitor Indoor Humidity: Use hygrometers to regularly check humidity levels in your home.
Address Water Issues Promptly
Timely repairs can prevent mold from returning:
- Fix Leaks Immediately: Address any plumbing or roofing leaks as soon as they are detected.
- Inspect for Condensation: Regularly check windows and pipes for condensation and address insulation issues.
Improve Ventilation
Enhancing airflow can significantly reduce moisture buildup:
- Install Exhaust Fans: Use exhaust fans in kitchens and bathrooms to expel humid air.
- Open Windows: Whenever possible, open windows to allow fresh air to circulate.
When to Seek Professional Help
While many mold issues can be handled by homeowners, some situations require professional intervention.
Indicators for Professional Assistance
Consider hiring a mold remediation specialist if:
- Extensive Mold Growth: If mold covers an area larger than 10 square feet, professional help is advisable.
- Health Concerns: Individuals with respiratory issues or weakened immune systems should avoid DIY remediation.
- Persistent Mold Problems: If mold returns despite your efforts, it may indicate underlying issues that need professional assessment.
Benefits of Professional Mold Remediation
Engaging professionals offers several advantages:
- Expertise: Professionals have the training and experience to handle mold safely and effectively.
- Advanced Equipment: They use specialized tools and techniques for thorough mold removal and prevention.
- Long-Term Solutions: Professionals can identify and address the root causes of mold growth, reducing the likelihood of recurrence.
Conclusion
Mold removal is a critical aspect of maintaining a safe and healthy home environment. By understanding the risks associated with mold, implementing effective removal strategies, and taking preventive measures, homeowners can protect their properties and the health of their occupants. Whether tackling minor mold issues or seeking professional assistance for extensive infestations, being proactive is key to ensuring a mold-free living space.
By following these best practices, you can create a safer, healthier home for yourself and your family.
For more information contact Us:
Business Name: New Jersey Mold Specialist
Address: 92 Bayard St #203, New Brunswick, NJ 08901
Call us: (732) 973-9352
Email: info@njmoldspecialist.com
Website: https://njmoldspecialist.com/